Inventory must be linked to a category type of inventory. To add a new inventory category, navigate to the Categories option in the Admin menu.
Step 1: Select the Inventory Category tab, then select the +Add button in the top right corner:

Step 2: Complete the fields to add a new inventory category:
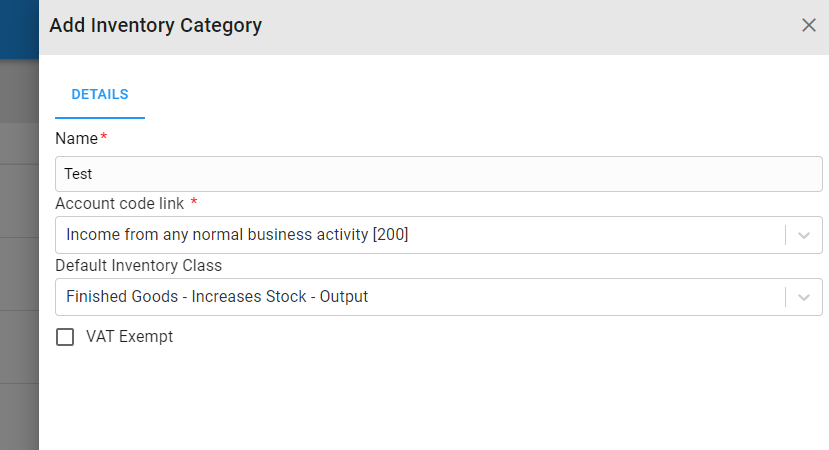
- Name: A name for the category, Inventory will be grouped by Invenory Category
- Account Code Link: Select the Account code to link any inventory assigned to the category to the account code
- Default Inventory Class: Select the default class the Category’s inventory should be assigned to
- VAT Exempt: Select the check box of the Category’s inventory rates should exclude VAT
Step 3: Select the Save button to add the inventory category OR Select the Cancel button to close the modal, then the item will not be added.
