Follow the sections below to view a brief description of all fields on the add job pop-up card:
Add Job Card
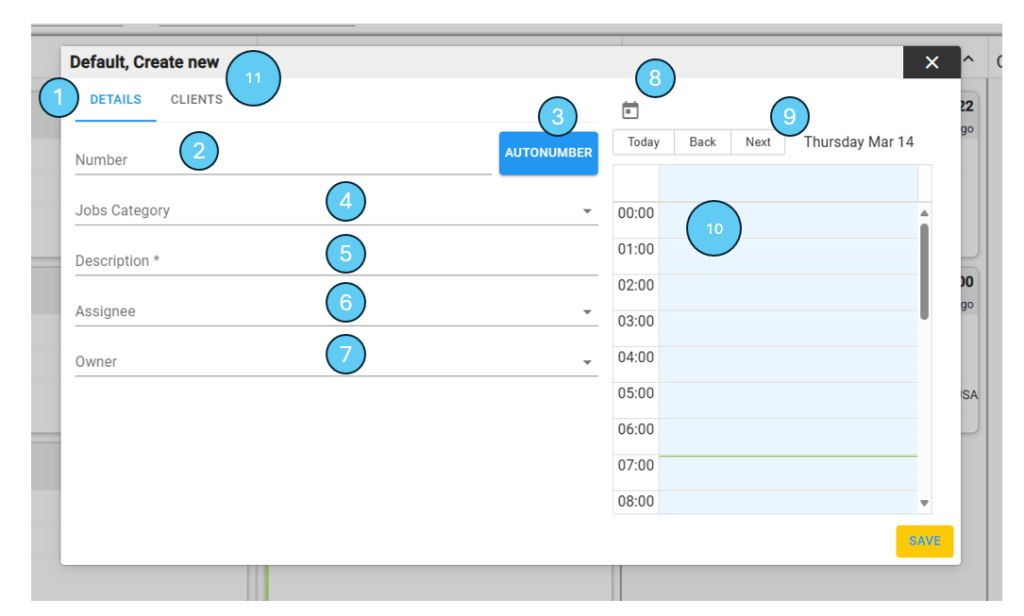
- 1: Details tab: switch between this tab and the Clients tab to ensure you complete all fields
- 2: Number: Here you can type in a job number if you don’t want to use autonumber
- 3: Autonumber: Select the button to automatically fill the number field with the next available job number
- 4: Select the job category
- 5: Enter a job description
- 6: Select an assignee, this is a system user
- 7: Select an owner, this is a system user
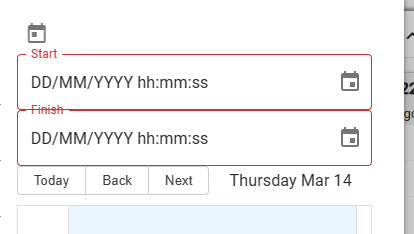
- 8: Select the calendar icon to select a start and date day and time
- 9: Use the today, back or next buttons to switch between days to schedule the job
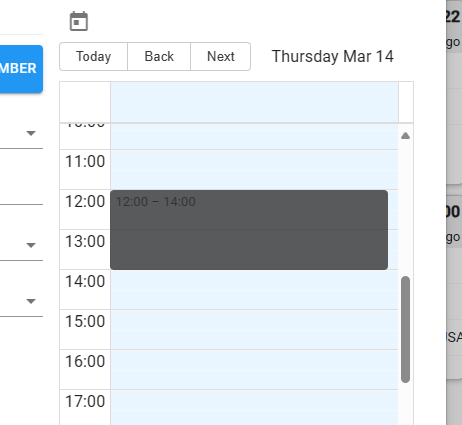
- 10: Instead of using 8, the job time can be used by clicking and dragging a start and end date on the selected date
- 11: Select the Clients tab to select a client or location for the job
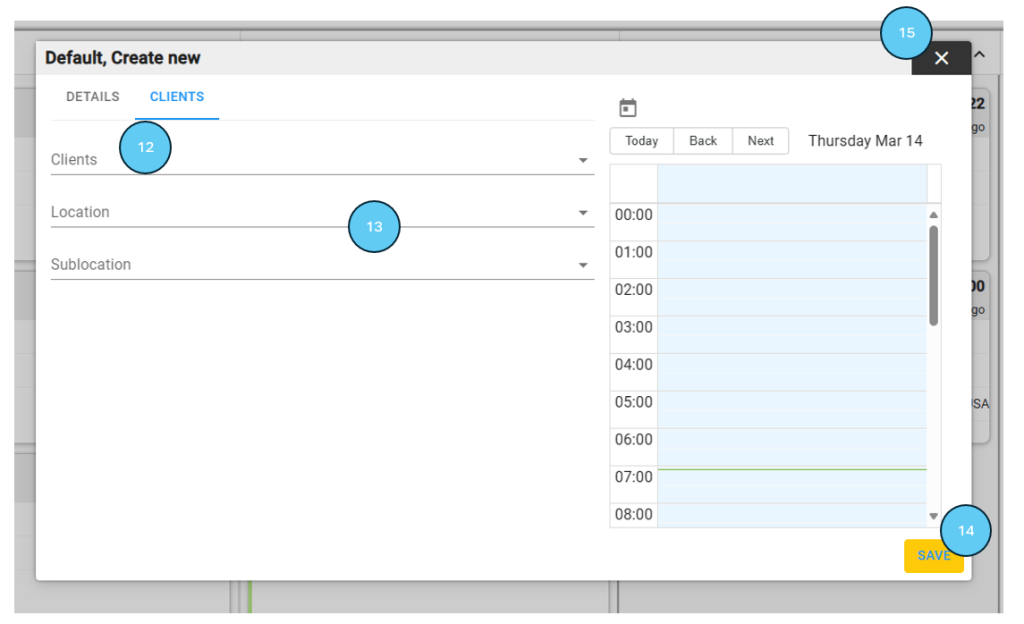
- 12: A Client OR Location is mandatory for a job, search and select the client name or
- 13: Search and select a location and sub location to link to the job
- 14: Select the save button to add the new job OR
- 15: Select the close button to close the pop-up, the job will not be added